- For enquiries contact us on:
- +44 20 8133 8180
- info@cuttergrp.com

Leveraging Freshdesk Analytics – Part 2
Leveraging Freshdesk Analytics – Part 1
28th February 2020Managing Home Workers
24th March 2020Leveraging Freshdesk Analytics – Part 2
This article is the second of a two-part series looking at the new Analytics feature in Freshdesk. The first part focussed on customer-facing reports and is available here, whereas this article will look at analysing internal statistics around agent productivity. These articles were written off the back of a Freshdesk webinar which is available here.
The first important thing to remember is that these statistics are just numbers. They will never show you the full picture around your employees, and alone will not tell you how someone is really performing. It’s always important to take the time to catch up with your team and discuss successes, challenges, training needs, and their overall well-being, as well as looking at the wider scope of what their work consists of both inside and outside of the helpdesk.
That said, let’s look at some statistics which can play a part in helping you form a view of your agents’ performance within Freshdesk.
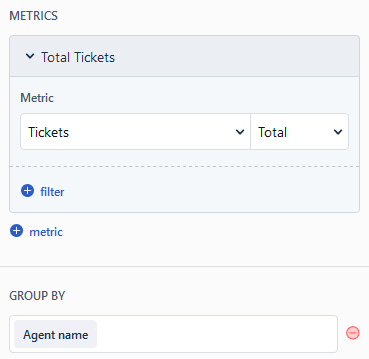
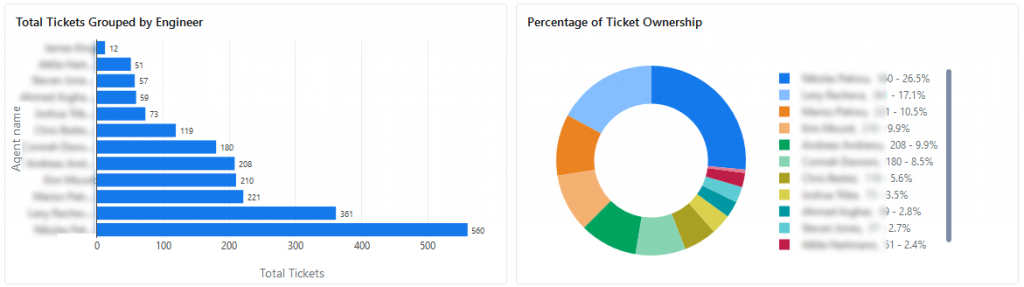
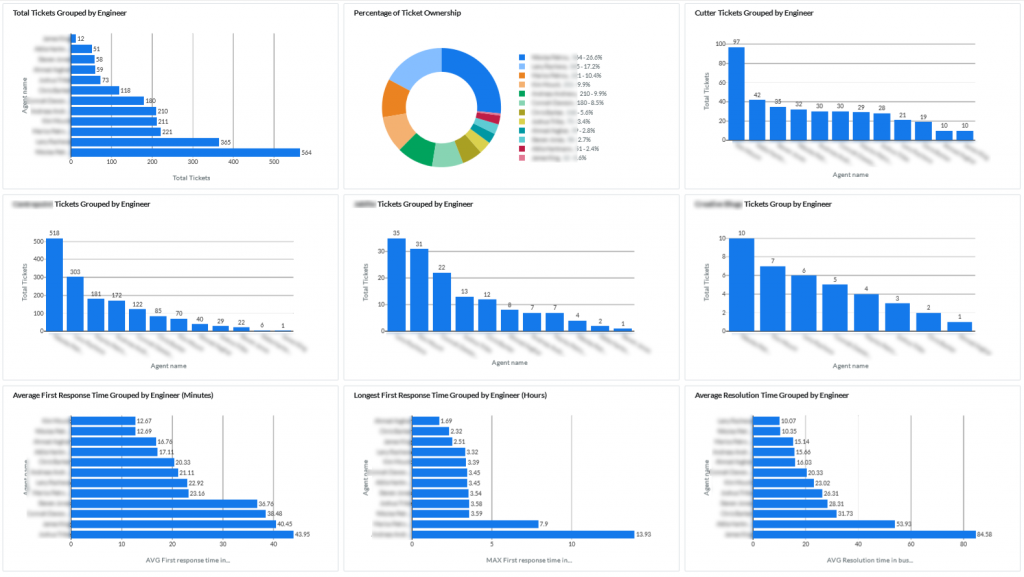
The first metric you probably want to look at is how many tickets is each of your agents is taking. There are a number of ways you can do this, the first of which is a simple Total Tickets metric Grouped by Agent name. This data is usually most easily viewed in a bar chart to show a ‘Total Tickets per Agent’ view. As always, be aware of bar charts truncating fields if you have any agents with similar names.
Alternatively you can view this as a ‘Percentage of Tickets Ownership’ which you may find a more useful statistic. Just change the value from Total to Percentage and try a Donut or Pie chart.
If you have multiple Products or Groups within Freshdesk, then you’ll probably want to break this data down further. For completely separate departments then you could create multiple reports and put a top-level filter on each for the appropriate Product or Group. If you have overlapping agents between departments then you can include multiple charts in the same report.
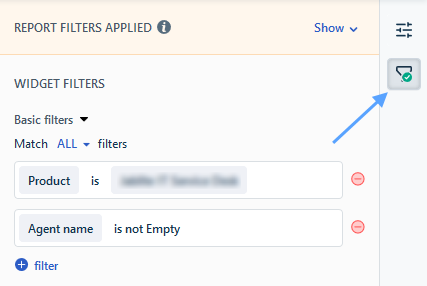
To do this, create a Tickets Total metric Grouped by Agent name as normal, then switch to the Filter section and apply the filters you need. We are going to set a filter for each of our Products, and also add an Agent name is not Empty filter to exclude any unassigned tickets.
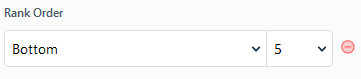
If you have a large number of agents then you might want to create charts just to show your ‘Top #’ and ‘Bottom #’ performers. You can do this by using the Rank Order feature also found under the filter section.
These ‘Product Tickets by Agent‘ charts should show you how your agents perform across multiple Products or Groups, and can offer a useful insight into where they spend most of their time. You can use this information to identify strengths, skills shortages, or Groups and Products that might need more attention.

Now let’s look at the responsiveness of your agents. One really key skill your agents need is to empathise with your customers (or end users) and remember that getting timely updates is important to them, as is having their issues resolved quickly.
The first chart we’re going to make looks at average first response times to give you an overall view of how quick each agent responds to new tickets. Freshdesk have thought of this need and given us a ‘First response time’ metric. We’re going to take the Average value and Group by Agent name.
The first article in this series mentioned how merging tickets in the ‘wrong order’ can cause Freshdesk to calculate the first response time incorrectly. You might see this in your ‘Average First Response‘ charts where an agent has an impossibly low or even negative figure. You can fix this by going to the Filter section for this chart and adding a filter that says ‘First response time is greater than or equal to 0 minutes’. This will filter out any tickets with a first response time that is a negative value (i.e responded to before it was created).

To look at each agent’s slowest response time, we follow the same settings but change the value to Maximum rather than average. This ‘Longest First Response‘ chart will let you see if any agents are particularly slow to get an initial response out to the end user, but be aware it can also mean these are the agents who take tickets their colleagues have avoided and pick them up because they are nearing SLA. Be sure to dig into the underlying data properly before making assumptions about what this statistic shows you. Also be aware this is another metric that can be negatively skewed by merging tickets.
Finally lets look at ticket resolution times. Again Freshdesk have made a metric available to us, giving you the ability to choose from a value in business hours or calendar hours, along with maximum, minimum, sum and average values.

All of these response and resolution time charts can give you a good feel for how quickly your agents are acting on tickets. However, do be aware that they don’t necessarily paint the full picture. The agent with the longest resolution times might be picking up the most challenging tickets, rather than just being slow. Likewise, the agent with the longest first response times might be the one who is always saving you from an SLA breach. Look into the data properly before drawing any concrete conclusions from it.
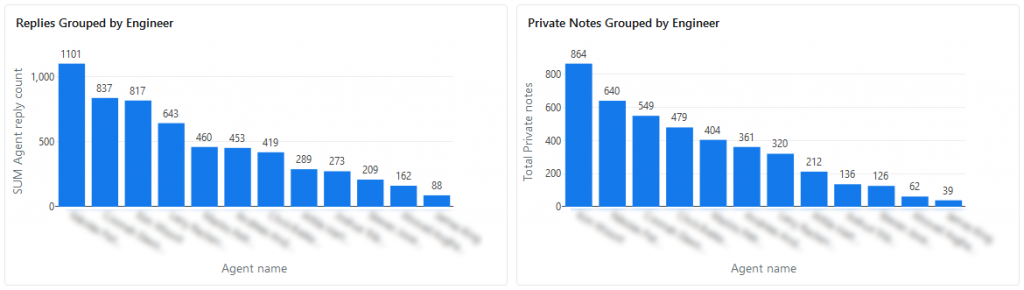
Let’s quickly look at some communication statistics to gauge how regularly our agents are talking internally and with the customer. Freshdesk gives us several metrics in this area, including ‘Agent reply count’, ‘Private notes’, Agent reply’, and ‘Agent responses’. We’re going to take Agent reply count Sum Grouped by Agent name to give us a ‘Replies by Agent‘ chart, and Private notes Total Grouped by Agent name to give us a ‘Private notes by Agent‘ chart. These charts give us a good idea of how regularly our agents are keeping customers up to date, and using private notes to communicate what they’re doing. Note these numbers will also be reflective of total ticket numbers, so perhaps a more useful metric would be to break this down by the average number of replies/notes per ticket.
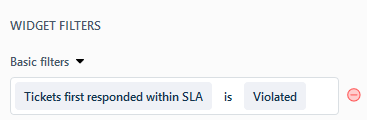
Finally lets look at a really interesting combination of chart settings that will tell us who owned any tickets that ‘Violated SLA‘. First we want to take the Tickets created Total metric and Group by Agent name. Then we want to switch to the Filtering section and set ‘Tickets first responded within SLA’ to ‘Violated’. Finally set the chart to a Donut chart. If any tickets breach first response SLA then the owner of the ticket(s) will show here.
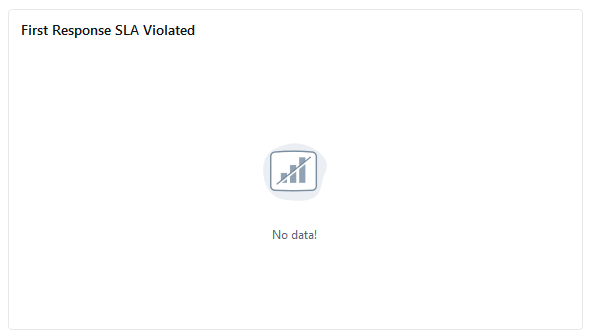
If your resulting chart looks like this then don’t worry – it just means you haven’t got any tickets that breached SLA!
Your final step is to set any top level Filters you require on the report, such as a Date Range, Group, or Product, and a scheduled export if desired. It’s important to remember that if you set any date range filters at the top level, you need to remove them from the individual charts. Many widgets when imported will include an ‘in the last 30 days’ setting by default. If you want to report on a different time scale then remove this from the chart settings completely and just set it on the report in one place.
There are many more metrics and charts inside Analytics than covered here. They are well worth exploring to discover which can best help you to analyse the performance of your agents within Freshdesk.